How to make a joiner photo
5 minute read
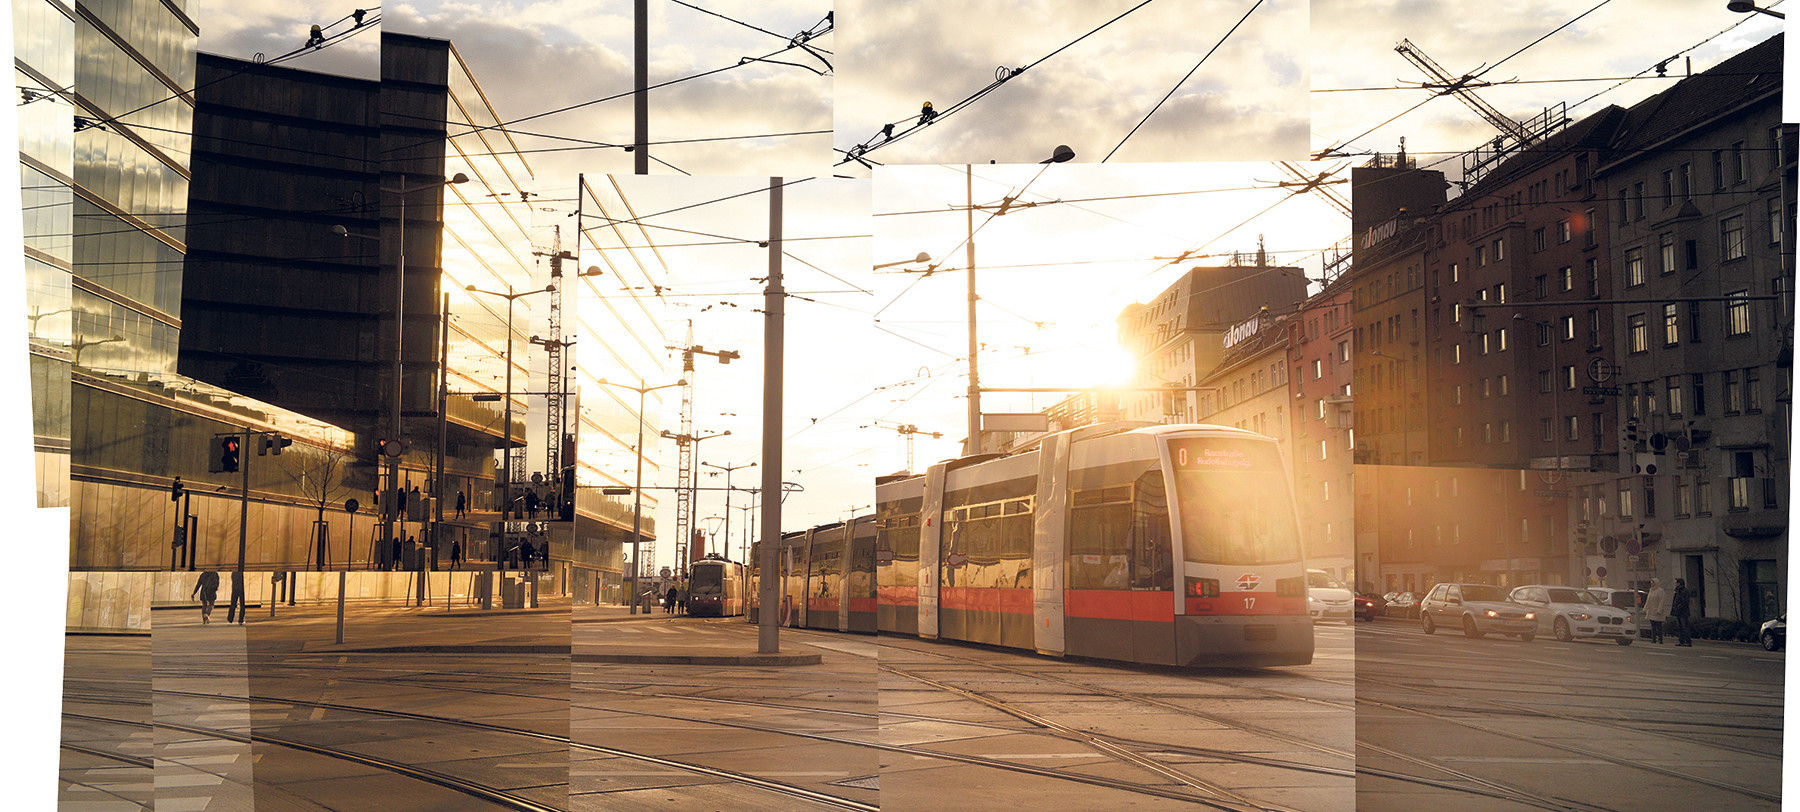
A David Hockney-inspired joiner photo shouldn’t be limited to the art world – it’s a fun, creative technique that every photographer should try. Here’s how.
The joiner photo started in the early eighties when artist David Hockney began using Polaroids to create unique collages. Quickly, his creations took on a more abstract nature, reminiscent of cubist paintings, and the joiner photo we know today was born.
In the age of digital cameras, the majority of photographers won’t have the means or the desire to shoot multiple rolls of film for the sake of one final image. Thankfully, there is a modern approach.
Hockney primarily used this technique for portraits, and cityscapes work very well, too, but you can use it to capture any type of scene to add an otherwise unachievable perspective and a creative twist.
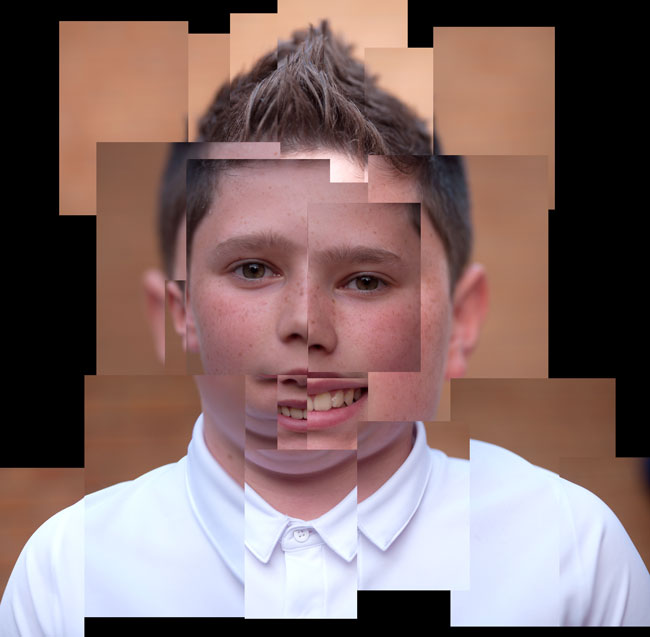
Image PN’s editorial director Roger created this joiner portrait a few years ago during his 365 photo challenge (credit: Roger Payne)
How to
For this tutorial, we’ll be using Photoshop. The steps would be the much the same in other editing software, though the specific commands will vary.
When you have your photos, the first step is resizing them. For the sake of your computer, you don’t want to open dozens of huge TIFFs at the same time, so it’s best to scale them down to smaller JPEGs. When your joiner photo is made, you simply won’t see the benefit of larger file sizes anyway. 2000px wide should be more than enough.
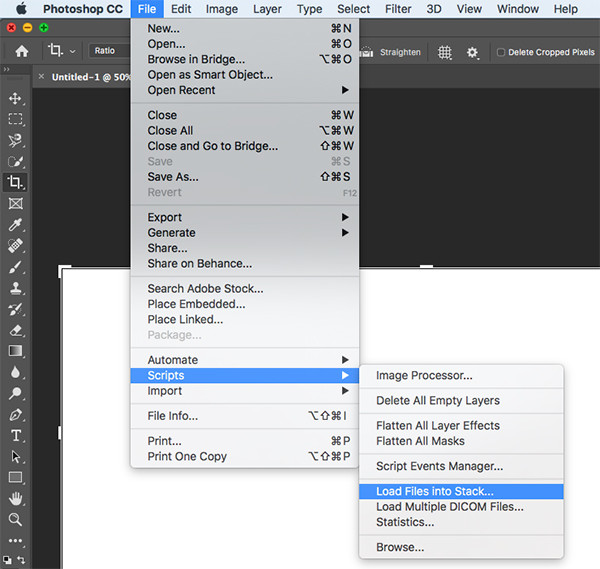
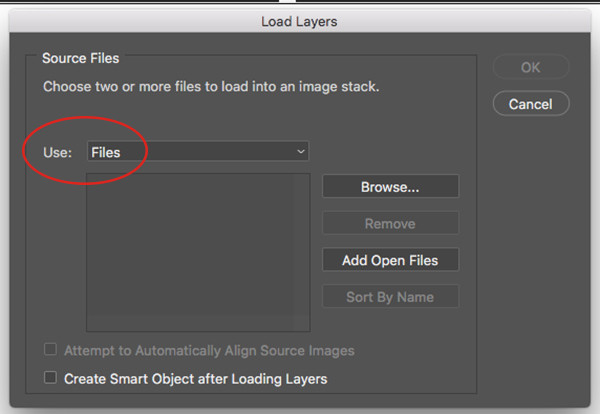
Next, you’ll need to open all of your photos within the same file. There are a number of ways to do this, but the quickest is to click File > Scripts > Load Files into Stack. Then, next to Use:, select Files, then click Browse. This way, you’ll be able to select the photos you want rather than having to select a whole folder.
When you’ve confirmed your selection, your images will open in the same Photoshop file as individual layers. To arrange them, you’ll need to create a larger background to work on, so click Image, then Canvas Size, and set your canvas to an appropriate size. You can change this later.
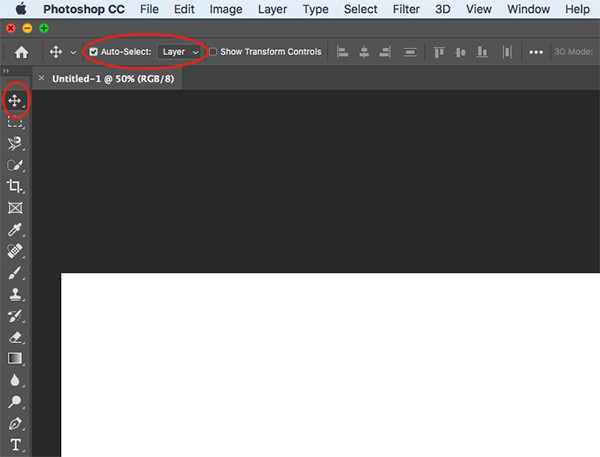
Select the Move tool and make sure Auto-Select: is checked and set to Layer. This will allow you to simply click and drag your photos to move them around the canvas. To resize and rotate, click your image and hit cmd+T. You can also drag your images in the Layers panel to move them on top of or behind other images.
Now, it’s down to you to arrange your photos as you please! When you’ve finished, you can right click in the Layers panel and Flatten Image to lock it on the background, or save it as a Photoshop file to make more edits later.
Tips
Our first tip is to take more photos than you might need. If you are shooting film like Hockney, you may wish to be more conservative and deliberate, but if you’re shooting with a digital camera, this won’t be an issue. You don’t need hundreds of images in your joiner photo, but it’s better to have more and not need them than need more and not have them.
Our next tip is to keep things fairly true to the scene. If you’re after something completely abstract, go wild, but usually the best results have at least a somewhat identifiable subject. Even Hockney’s first joiner photos were neatly organised grids.
Even if you aren’t moving elements of your scene all over the place, you do want each photo within your joiner to stand out from the others, so here’s our third tip: when shooting your photos, capture slightly differing exposures and focus points. This will add interest to your joiner photo without being too distracting.
Finally, be aware of your edges and background. Don’t feel you have to line the edges of your joiner up with the flat edges of the canvas – though if you do want to, that’s your creative choice. If you are going to have some background behind your photos, put a few moments of thought into it and see what complements the overall piece.
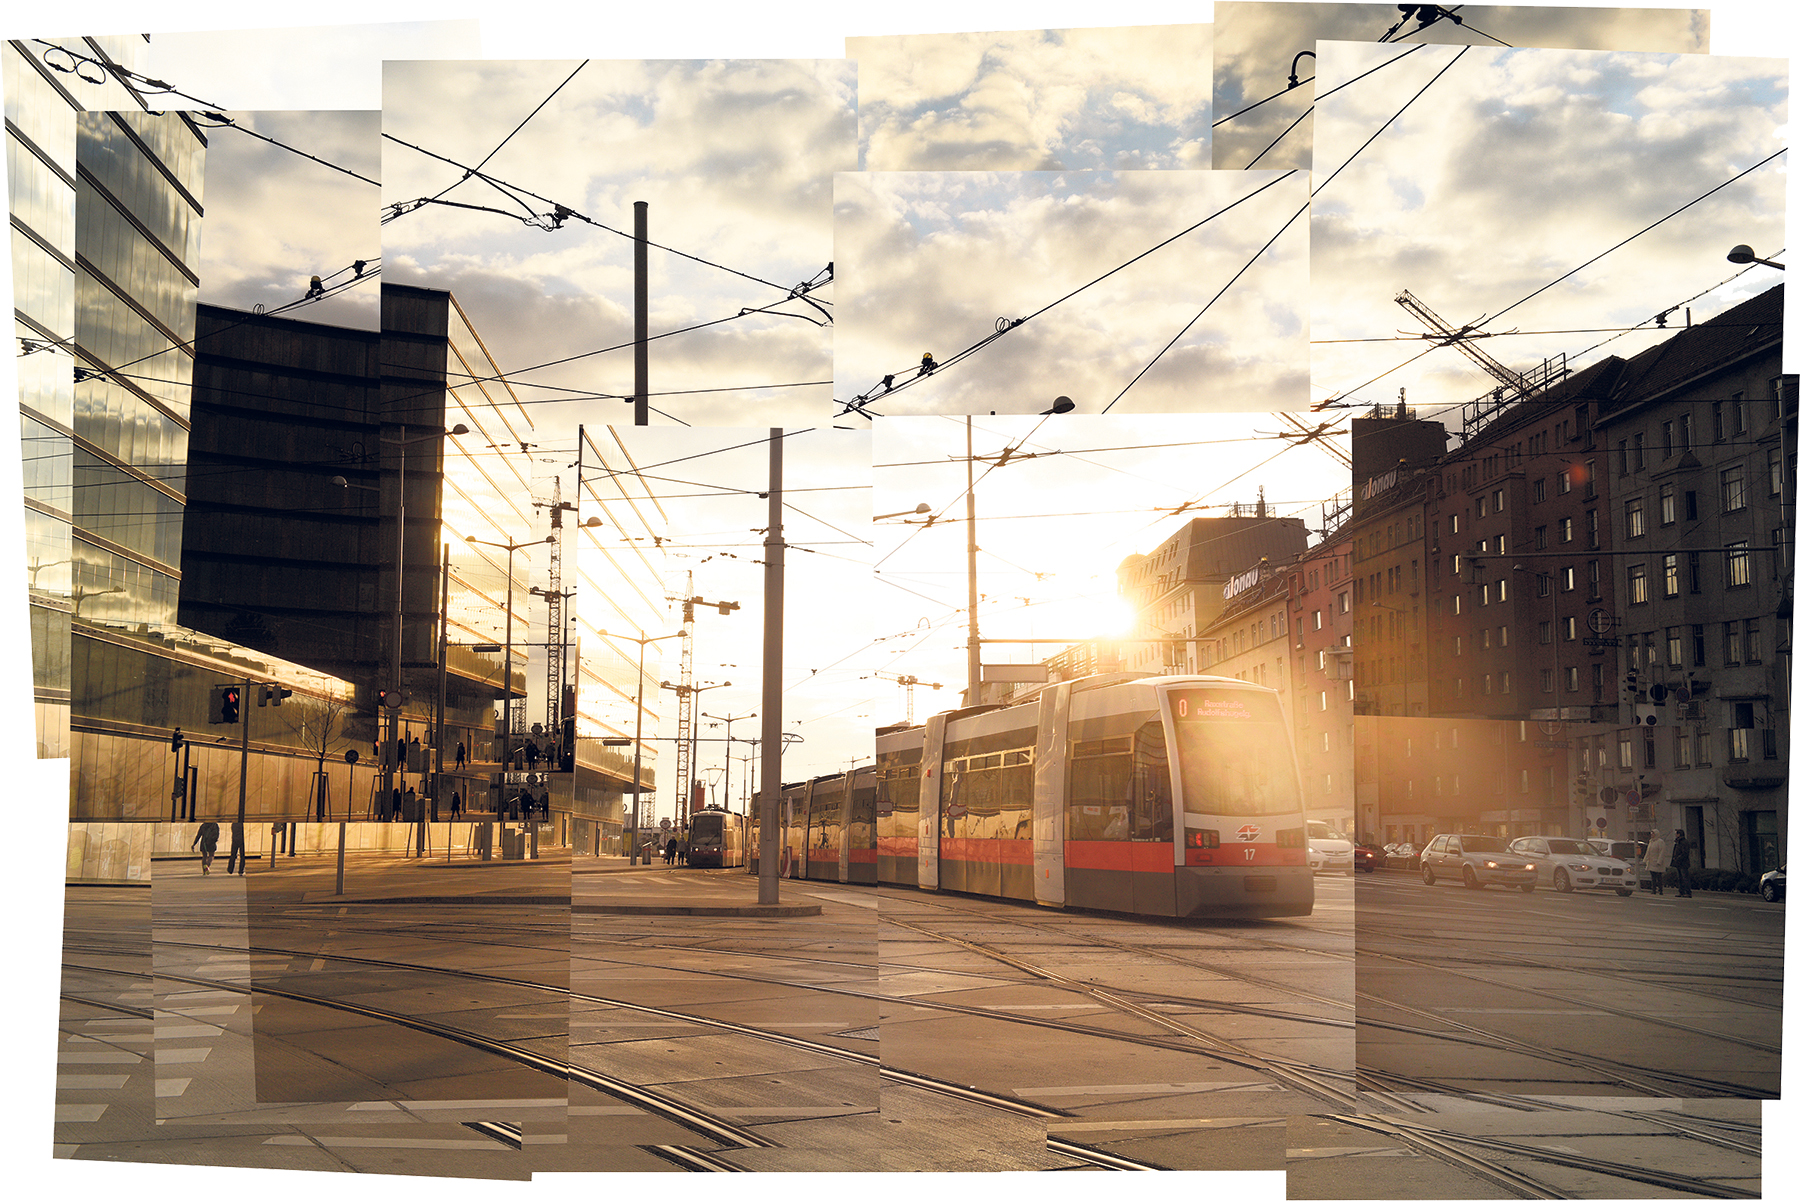
Image Here’s a closer look at this street scene, which perfectly illustrates how effective your joiner can be when done subtly (credit: Kingsley Singleton)
We’d love to see your joiner photos! If you give this technique a try and want to share your results, tag us on Instagram or Twitter using the handle @photonewspn.
For more tips, techniques and guides, why not visit our Inspiration section – we’ve got something for photographers of all interests!
Don’t forget to sign up to receive our newsletter below, and get notified about the new issue, exclusive offers and competitions.

