There’s something in the attic: The Photography News Podcast #2
Posted on Apr 17, 2020
Lockdown means we’re all spending more time in our lofts or sorting out sheds… and you never know what you might find, including some great subjects for still life photography.
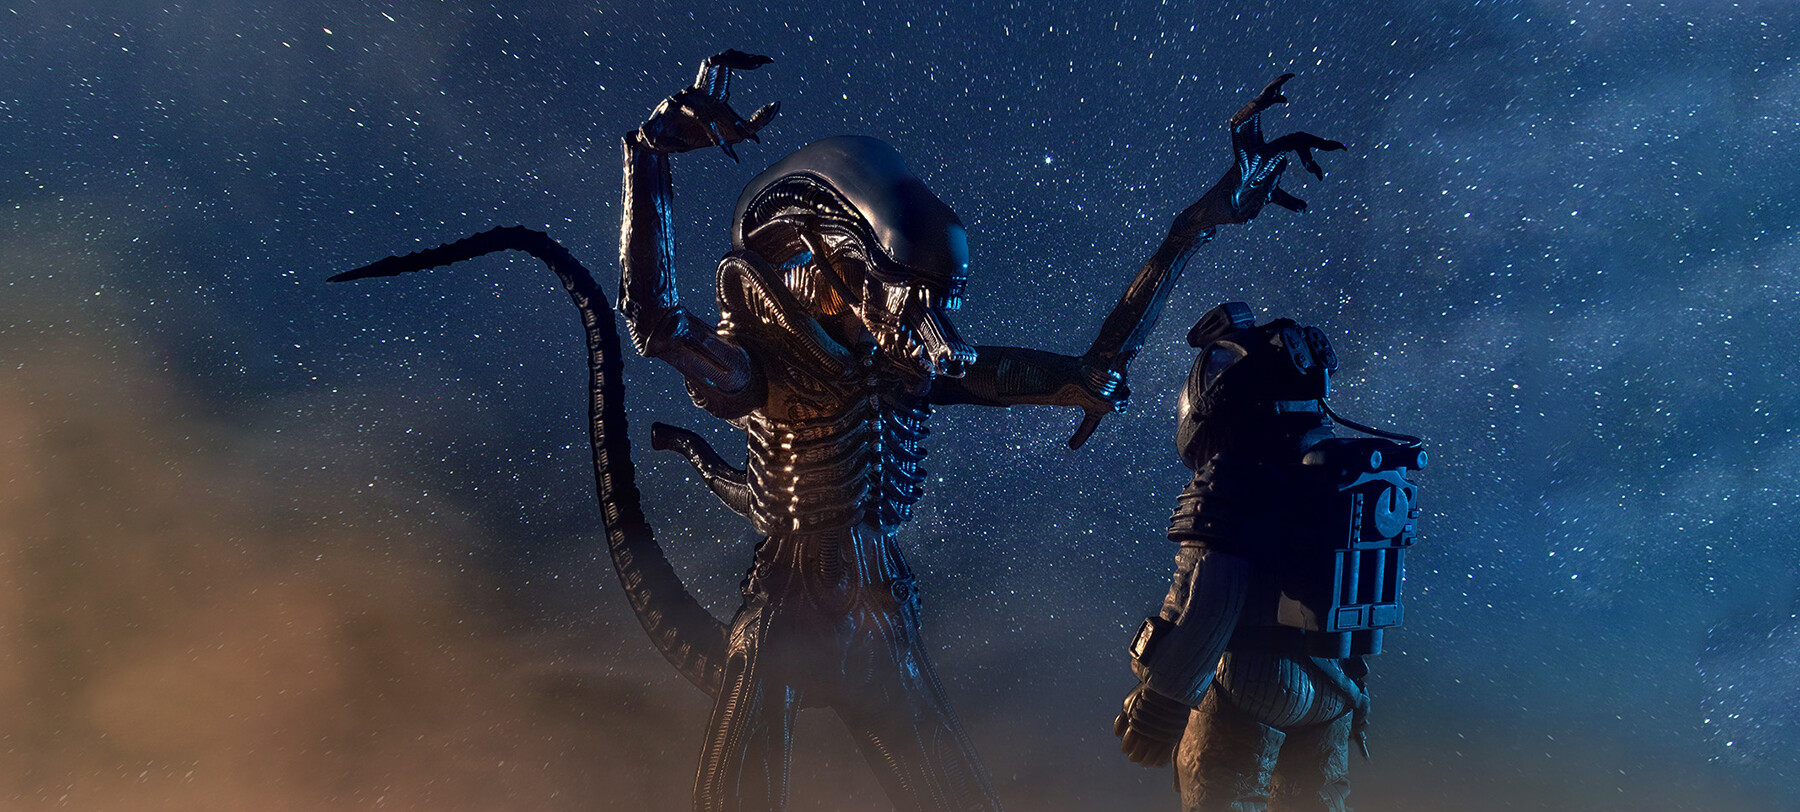
In episode two of The Photography News Podcast, the subject of lockdown being a good time for a rummage in your loft came up. And while Roger dug out a camera – that, if it were a human, would be old enough to drink, drive, vote, get married, have a few kids and still have years left for a few divorces – both Will and I found things to take pictures of, rather than with. Mine were some old toys, which I decided I’d set up as a still life.
But it’s not enough just to plonk a few things in front of a camera and take a picture, is it? No. I decided I’d make a bit more effort in terms of lighting – and also adding some atmosphere with smoke. Plus, I wanted to add a starry backdrop in Photoshop, which would mean shooting in a few frames as ‘mattes’. More on that later.
So I set everything up on the dining room table, using a simple black backdrop to start with – just a large piece of card. And then the Alien’s feet fell off. So much for “its structural perfection is matched only by its hostility.”
Oh well, it had been in the loft for 15 years. No matter, I decided to kneel it down and use some gaffer tape to secure it. Actually, there was some serendipity to its amputation. The scales of the astronaut and the creature were different, and kneeling it made things work better.
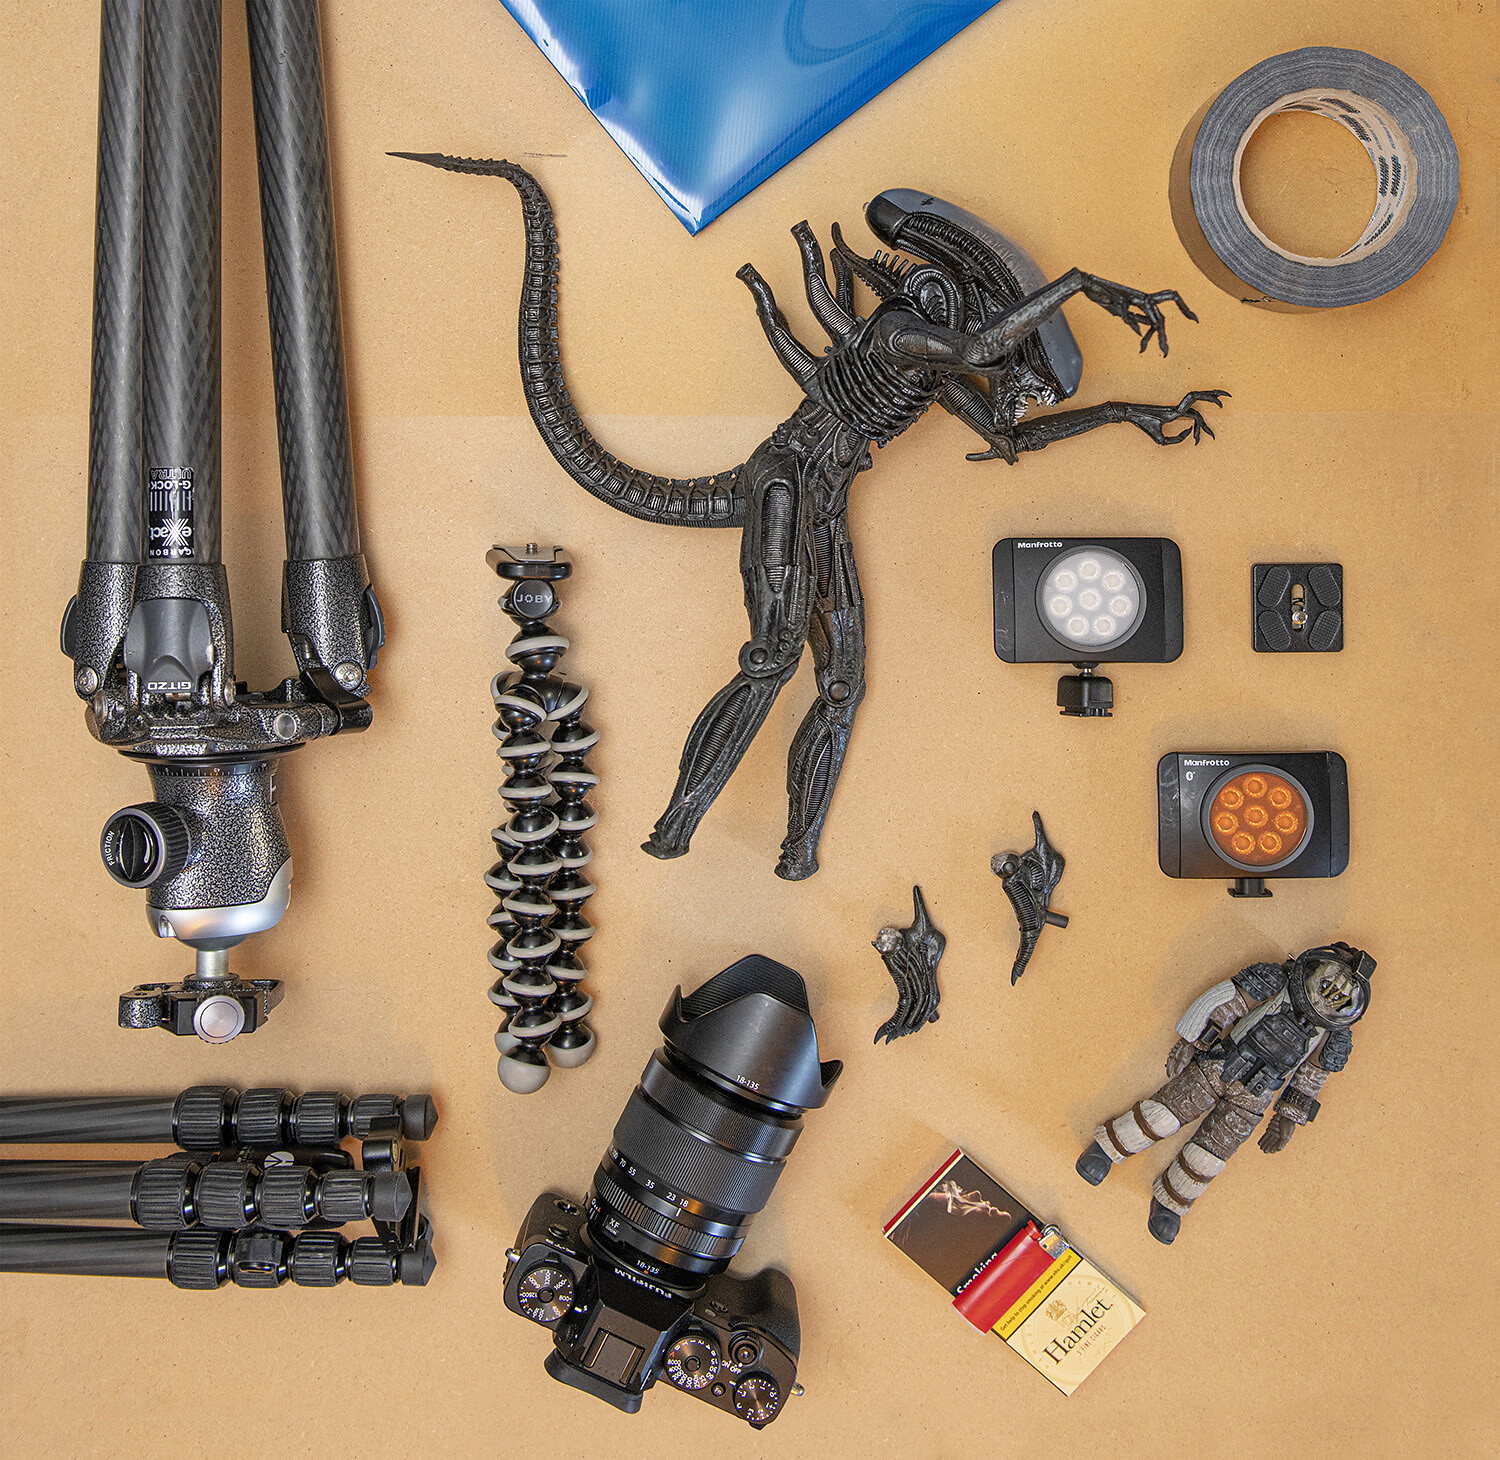
Tripods are important for shots like this. You don’t want to be shooting handheld, as the shutter speed will be too slow, and other accessories can be kept in place on tripods, too. I set up my camera – a Fujifilm X-T3 – on my recently cleaned and refurbished Gitzo Systematic 3, and made sure I was happy with the composition before moving on.
Next, I placed my lights on two other sets of legs. A small Joby Gorillapod for one, and a Manfrotto Element Traveller Small for the other. Shooting from a tripod also lets you combine frames more easily. So if you like the lighting in one part, you can just add that to the mix using Photoshop Layers and everything will line up.
For lighting, I used two small Manfrotto Lumimuse 8 LED lights at around £75 each. These come ready to attach to a regular 3/8-inch screws, so they’re easy to mount. They also have several snap-fit filters included – two orange gels and a diffuser.
On the light behind the Alien, I fitted both orange gels to give it a warm look. On the other Lumimuse 8 I wanted a blue filter, and though you can get a Lumimuse Classic kit with lots of filters including blue, I didn’t have that to hand, and needed to improvise. No problem there, as all you need is a translucent blue plastic to fit over the lamp. For instance, you can use sweet wrappers for this – but I found a clear blue document folder and slid that over the light.
I also wanted to sharpen the light from behind a little, so I added two strips of gaffer tape to the lamp’s lens, leaving just a small slit. The smaller the light source, the harder and more contrasty it’ll look, picking out the details, which is exactly what I wanted.
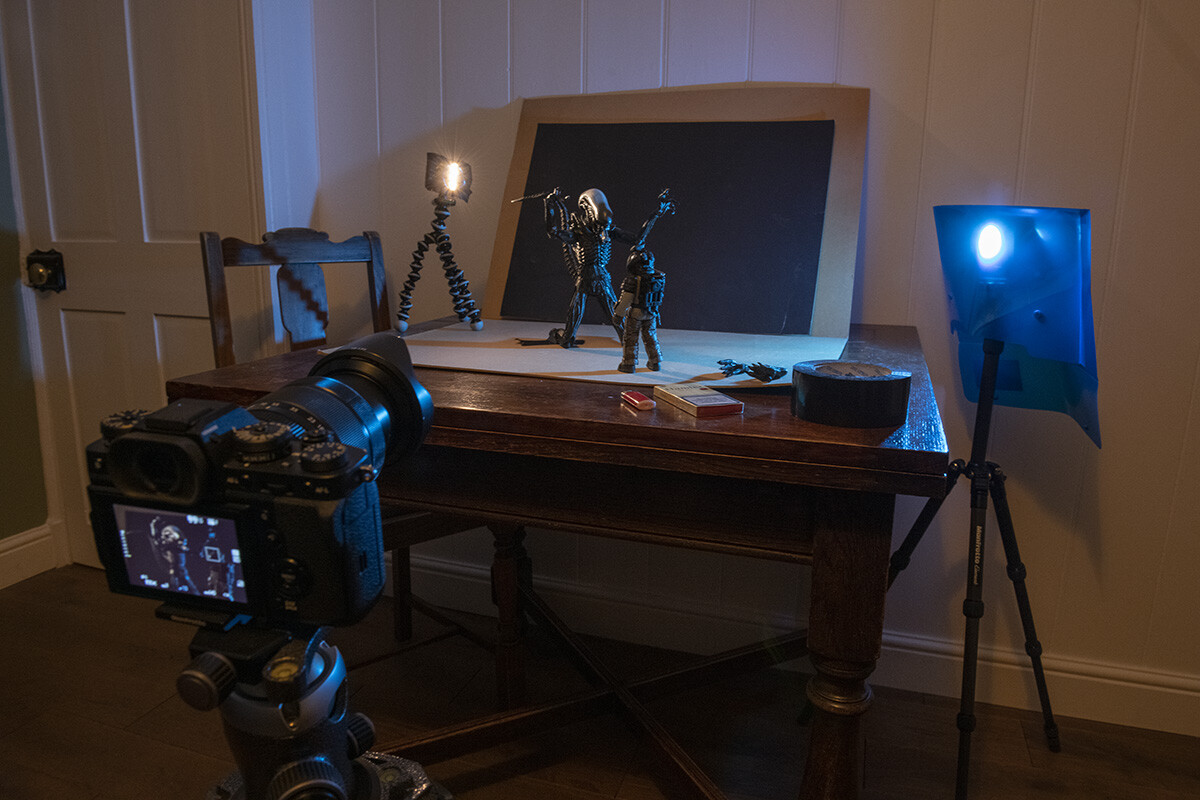
Time to shoot, and also add some smoke to the scene. I set the X-T3, in aperture-priority mode, dialled in an aperture of f/14, an ISO of 640, and also added -3EV using the top dial. This gave me a shutter speed of 1sec. I set the focus, then put the camera in self-timer mode to take a test shot. It looked good, so I could then reshoot a few times, adding the smoke using a few puffs from a cigar. Windows open for this part of the technique unless you want to be answering some awkward questions.
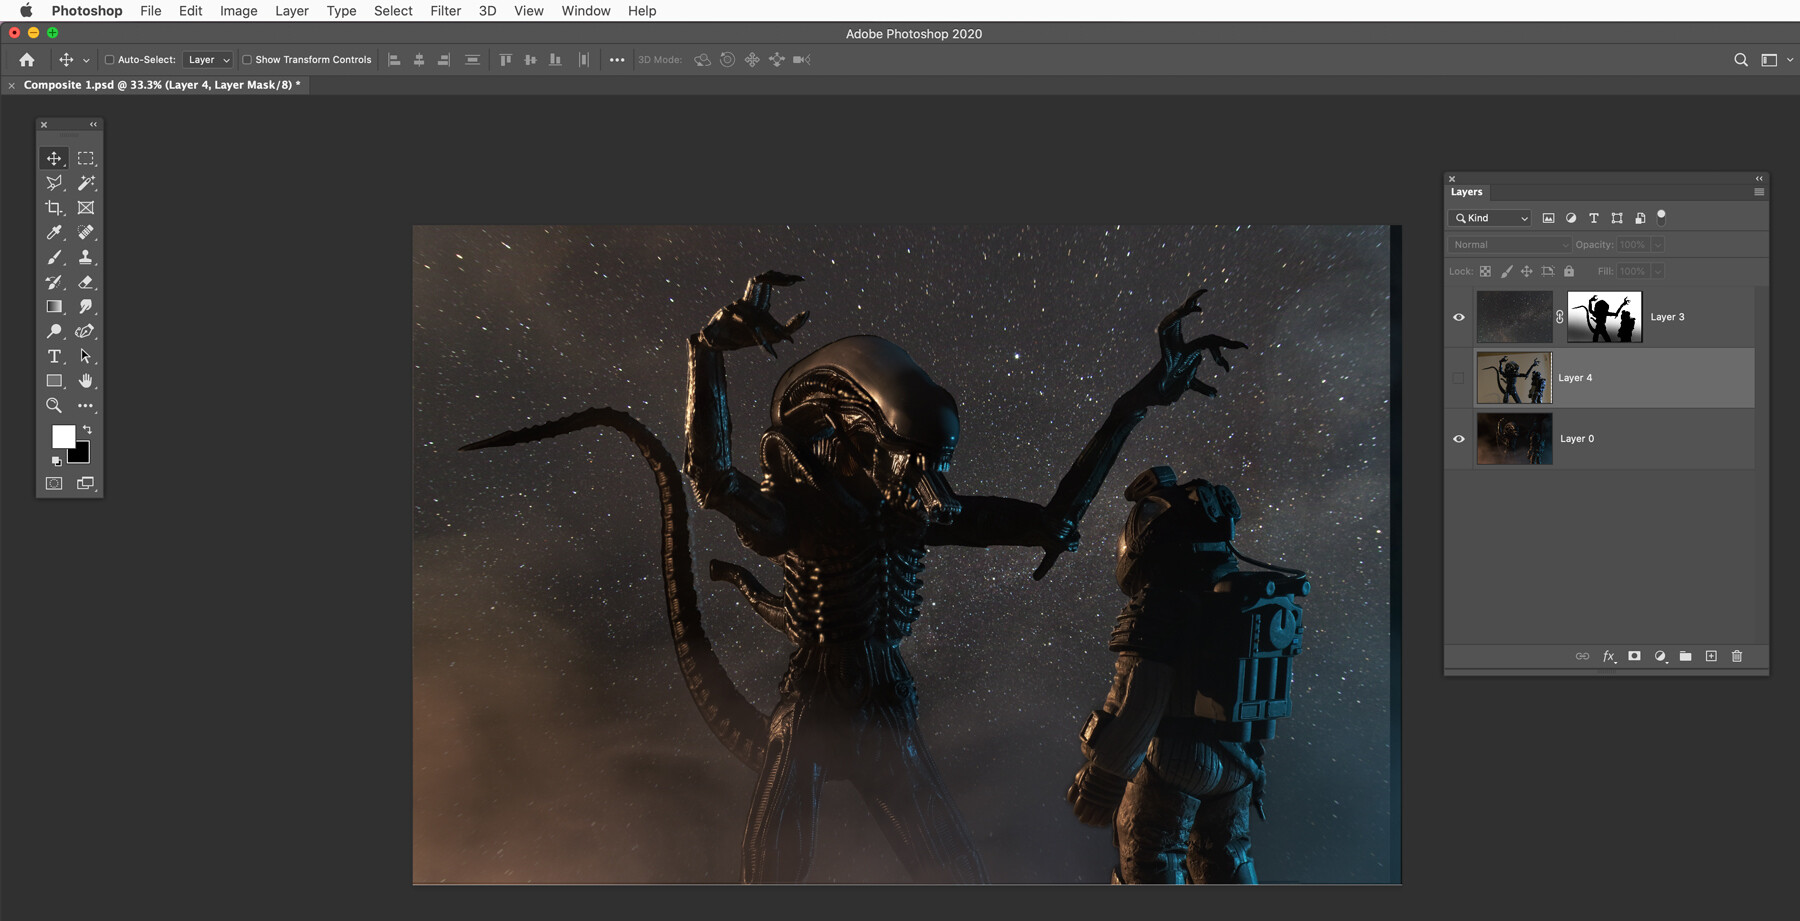
Finally, I shot a matte frame. This is an old movie trick that allows easier compositing of special effects into a frame. To do it, I simply replaced my back background with a white one, which let the figures stand out more clearly.
In Photoshop, I used File > Scripts > Load Files into Stack, and chose the best of the pictures, the matte frame, and a shot of a starry sky. This loads the pictures into the same document as layers. Next, on the matte layer, I used Select > Subject, which automatically selected both subjects. Back on the stars layer, this selection can then be used as a mask to combine blend the background with the subject. A bit of extra masking brought the smoke in more strongly. But that was all that was required.
Having a root around and finding some interesting subjects definitely paid off, because it gave me some inspiration over and above things I might normally use. Make sure you give it a try, too.
You’ll find other great indoor shooting ideas in episodes one and two of The Photography News Podcast. You can listen now on YouTube or Spotify.
Don’t forget to sign up to receive our newsletter below, and get notified about the new issue, exclusive offers and competitions.

