Making Movies: Compose Yourself
Posted on Jul 1, 2023
Using the tried-and-tested rules of composition – and then adding motion – can transform your filmmaking to a Hollywood standard
Words by Adam Duckworth
Composition is one area where photographers making the move to shooting video have a big advantage. Many of the rules of organising the elements within a shot still apply.
The classic rule of thirds is a good example, whereby we divide our frame into thirds – both horizontally and vertically – to create a nine-section grid. The most important elements are placed at the points where the grid intersects, as these are where the eye tends to go first.
Don’t be tempted to just slap your subject right in the middle, or place the horizon across the centre of the frame. Aim for a third of the way in. And when there’s a moving subject, think about placing them on the third, providing space to move into.
For wider shots, like landscapes, we need an eye-catching middle ground and background. But most crucial is some foreground interest, to lead our viewer’s eye into the shot and take them on a journey.
Lines, whether man-made or natural, can help lead observers’ eyes into and through the shot. Power lines and roads can be simple yet effective tools here, particularly an s-shape, such as a winding path.
Setting our camera up so we have a low perspective can make a straight road ahead of us appear triangular in shape and draw the eye towards the horizon. And whatever the case, we need to make sure our shapes and lines are taking the viewer where we want them to go, while keeping our horizons straight!
Another helpful compositional tip that works for stills and video alike is using the frame-within-a-frame technique – utilising surrounding objects to form a natural frame. If shooting a house, for example, overhanging branches from nearby trees can help frame the subject and draw the eye into our shot. Photographing or recording a subject through an actual window frame is another tried-and-true tip.
These compositional hints are guidelines rather than rules, though. Sometimes ignoring the rule of thirds and going for a totally symmetrical shot can really work. But getting to know the standards before breaking them gives you a solid foundation.
Golden rules
With a still photograph, we’re often trying to tell a story within a single frame. But in video we usually need many shots that link together in short clips. A much-used video rule is wide, medium, tight, repeat.
It helps to start a scene with a wide establishing shot, so the audience can understand the environment. From here, move into medium and close-up shots. Then do it again. You often need a wider variety of shots, from different angles, to tell an effective story.
Try not to make any shot last longer than ten seconds. In fact, the shots in most films only linger for three or four seconds. That’s why lots of B roll footage capturing details rather than the main action is important, as you’ll need many shots.
The biggest moviemaking rule is to avoid ‘crossing the line’. It’s a long-established convention that cameras must be placed on one side of the action, and not cross the axis.
This is an imaginary line that passes through the two main subjects filmed in a scene – facing each other, one on the left, the other on the right. Conventionally, the camera must maintain that left-right relationship in order to keep the scene simple to follow and avoid disorientating or distracting the viewer – which inserting a sudden reverse-angle shot might do. This is an important rule of thumb.
The move to motion
In stills photography, the camera is usually kept static at the point of the shutter being fired – apart from panning shots, where we’re attempting to create blur to give a sense of movement. By contrast, in movies, motion is a critical element of every shot. Even if the camera is locked on a tripod, there should be motion in the scene, such as a subject walking into our frame. If the camera is locked down and there is no movement at all, it creates tension; the viewer is waiting for something to happen. One example is a horror/thriller classic showing a close-up of a static door handle – but the audience is gripped in the knowledge that, at any second, it will start to move.
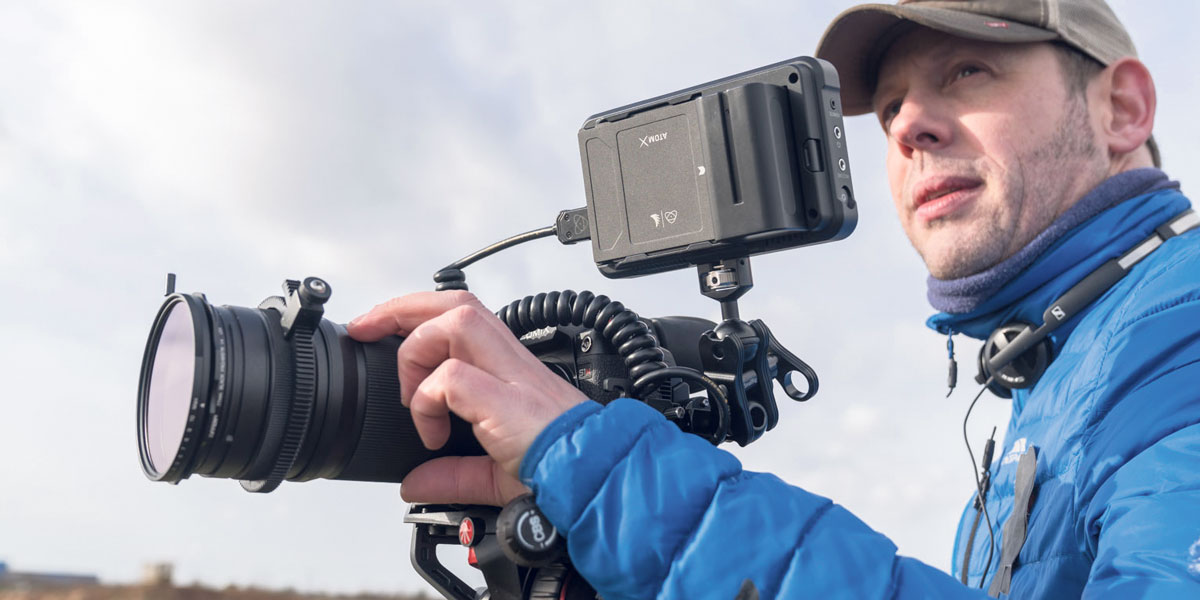
The vast majority of shots in movies involve some movement of the camera. This is often in the form of a panning and tilting shot, which is best done with a solid tripod that uses a fluid-damped head. Nothing looks worse than wobbly footage, unless you are intentionally going for that handheld, fly-on-the-wall, shaky-cam look, the beloved of police crime dramas or The Blair Witch Project. In these cases, the wobble adds drama and excitement – so, if intentional, it’s not always bad technique.
Too much zooming or panning when filming can look amateurish; it’s better to shoot multiple clips at different focal lengths and piece them together. Otherwise, constantly moving the camera around while filming is an easy way to make viewers feel queasy. It’s best avoided, unless making our viewers queasy is what we’re after, of course.
When panning or tilting, we also need to consider the speed of our movement – a slow pan can build suspense, while a quick whip brings an element of surprise.
The whip pan is simply a very quick pan – but it can also be used to hide a cut in the edit, allowing us to join two shots in a much more seamless way than a hard cut could. Typically, the whip pan works best in faster-paced scenes – all we have to do is pan rapidly out of our first shot and into the second, then, in the edit, join the two shots mid-blur. A slower shutter speed to allow for increased motion blur – or even some added motion blur effect during editing – can help out here.
Really move that camera!
Our camera isn’t limited to simple pans and tilts while locked down on a tripod. Smooth camera movements using sliders, dollies, jibs, gimbals or even drones can really add to the production value of our film if done well. We can even jump on a skateboard, securely mount our camera to a moving vehicle, or mount an action camera on our helmet as we cycle – anything to create smooth movement could work. Remember to switch on your camera’s image stabilisation if it has that feature.
Many filmmakers begin with a slider, which is a long rail you mount your camera to, and then push it along. These are great for reveal shots, where there is good foreground detail as we start filming, and then as we slide past, the middle ground and background is exposed. The cheapest examples are simple aluminium rails, but more advanced options use carbon-fibre rails, powered camera mounts and app controls via a smartphone. Camera sliders developed by manufacturer Syrp include motorised examples and cable cams that can be used on cable runs over large distances.
Another option is a dolly that the cameraman sits on, which runs on long tracks. Typically these are pricey, but a more affordable option is the Hague D5T tripod tracking dolly kit, which costs £359. Or take a look at jibs and cranes, where your camera fixes to the end of an extending arm mounted on a large tripod and you move it manually.
The most popular devices, however, are three-axis stabilising gimbals, which offer incredibly smooth motion and even enable time-lapse or motion-lapse shots.
A gimbal means you don’t need to set up a tripod or crane – just hold it to capture shots that aren’t possible any other way. You can walk with your subject for a tracking shot, do smooth dolly-in or dolly-out moves and sideways reveals like a slider. You can even mount one to the end of a boom arm and slowly lift it up from ground level to as high as you can, revealing a scene bit by bit. Gimbals take time to set up and learn to use effectively, but are one of the most popular accessories available to quickly increase production value.
Just don’t forget composition! Motion is good, but controlled motion and considered composition will transform your humble video projects into scenes reminiscent of big-budget Hollywood movies.
Originally featured in Issue 108 of Photography News.
Don’t forget to sign up to receive our newsletter below, and get notified about the new issue, exclusive offers and competitions.
Have you heard The Photography News Podcast? Tune in for news, techniques, advice and much more! Click here to listen for free.


